
Filters – Why do we use them?
Live as if you were to die tomorrow.
Learn as if you were to live forever.
– Mohandas K. Gandhi
Filter is a must! Some might argue with me that filters diminishes the quality of your photo and I agree to some degree. However, it is only noticeable when you are more than 100% zoomed in! It is not really noticeable unless you are shooting directly at the sun or a light source that is huge enough to create glare. Other than that, you can’t really tell the difference.
I use a UV filter to provide extra protection to the front of my lens (water, dust, scratches, etc). Filters are cheaper to replace than lenses! I’d rather spend $50 on a filter than replace my entire lens for $1,000.
These pictures were taken at Salton Sea using a circular polarizer:


To show and demonstrate different types of filters and how they work, please watch the video provided below:
I hope you learned something.
Time Lapse!
It has been a while since I’ve updated my blog. I have been really busy with everything else in my life that took away a little bit of time left for photography. But it doesn’t mean that I’ve stopped taking pictures! I actually still have quite a lot of pics in my RAW folder that I need to edit. *sigh*
My last post was 5 months ago and since then I have traveled to different parts of Canada, Philippines, Malaysia and of course, the good ol’ California. Enough of my introduction, let’s get to the reason why I am creating this post, it’s about time lapse! You all have probably seen these pictures that looked like fast forwarded videos. Well, they are actually composed of hundreds/thousands of pictures played at a faster rate. I really wished I had this in mind when I traveled to different places last year and this year. But it’s not too late, I will probably do it in the future.
How to get started on Time Lapse. Here’s what you’ll need:
- DSLR Camera – to help you capture high quality images
- Timer remote or an intervalometer – it basically tells your camera when to take pictures so you don’t have to stand and take it manually
- Tripod – to create clear pictures, you’ll need a very good tripod. Invest on a good tripod if you don’t have one. You can have the best camera but if you have a poor quality tripod, your pictures are going to be blurry!
- Video editing software – I use Adobe Premiere, this software will allow you to combine your pictures and play it at a faster rate (24 fps +)
- TIME – you need time! Without time, you cannot create a time lapse!
- Patience – You need to be patient! Patience is virtue! lol
If you need a more detailed tutorial, click the link below:
Check out some of my new uploads on my website: www.jmephotographie.com
Have fun!
Camera 101 – What is Aperture???
I talked about Aperture a few posts ago but I didn’t really talk about it in details. Some of you found that using A mode or Av mode to be useful and takes better pictures than Auto but you didn’t really understood why. Well, first let me give you the Princeton definition of Aperture: a device that controls amount of light admitted; a natural opening in something; an man-made opening; usually small
In short, it’s that round thing that you see inside your lens. If you look close enough, your camera actually moves it to make it smaller or bigger. The larger the aperture, the more light it takes in. The smaller the aperture, the less light it takes in. Now, look at the pictures below, one was taken at f/5.6 and the other at f/1.4. The smaller the number, the bigger the aperture gets and the bigger the number, the smaller the aperture gets….. what???? Yes, this can get confusing sometimes. You might hear someone say “wide aperture” and that means “big” aperture or the largest aperture your lens allow. For example, if you have a 18-55 f/3.5-5.6, the largest aperture that your lens will allow is f/3.5 at 18mm. Since the lens has 2 numbers, this means that your lens is not a “fixed” aperture lens. Your aperture changes depending on your focal length. Now, examine the pictures below and tell me what you see:

Above: Taken at aperture 5.6 or f/5.6

Above: Taken at aperture 1.4 or f/1.4
Now that you’ve looked at the pics, you will notice that one is clearer than the other. The first picture was taken at f/5.6 and this aperture will pretty much get everything in focus, it’s still a little bit out of focus but the background is still a little bit distracting. The second picture was taken at f/1.4, at widest aperture my lens allows (50mm). The subject in the middle is completely in focus and the rest are out of focus (my focus point was in the middle). You can actually change your focus without moving your camera. If you look in your view finder, you will find several boxes (depending on camera model), some will have 3, 11, 39, 51, etc. focus points. You can move your focus points by using the arrows behind the camera. If you can’t move the focus in the view finder, you might be in “Area” mode and not in “single/dynamic” mode (refer to your camera manual).
Here’s a video that pretty much shows you how aperture works.
Camera 101 – Settings (P,S,A,M)

So you’ve purchased your first DSLR and you start taking pictures but your pictures are still coming out like it was taken using a compact camera. Now, you start to wonder why you wasted your money at a more expensive camera and get the same results. Hmm… Then you start playing around with the settings and you might find that you like a particular settings, maybe that one setting with a picture of a person with the star, yeah, that’s the one! The night shot mode! But you didn’t buy a DSLR to just use one settings, you wanna use it in full manual mode but you are not getting the picture you want.
Okay, let’s break this down to a level where everyone can understand and I’ll have a few scenarios. First, let’s forget about those settings with pictures and STOP USING AUTO!!! You know, the Green Box! Let’s just focus on the following modes:
- Program
- Shutter
- Aperture
- Manual
Program Mode is just like auto but you have control of the flash. The camera will automatically adjust the exposure, shutter speed and aperture to get that properly exposed picture. Some cameras will automatically adjust the ISO but you have to set it first (read the manual). I use this all the time when I’m just walking around and not looking for a particular look.
Shutter Priority Mode lets you control the shutter speed and the camera adjusts everything else. So let’s say you’re shooting a concert and you want a sharp picture and you know that you cannot shoot the photo at less than 1/320th of a second. So you set the shutter speed to 1/320th of a second and the camera will do the rest to give you that shot. Of course you have to increase your ISO for that.
Aperture Priority Mode let’s you control the aperture. The aperture is round thing inside your lens, the bigger the aperture the more light it allows and the smaller the aperture the less light it allows. So if you want to shoot a concert or a subject at a very low lighting condition, you have to shoot at biggest aperture to allow as much light. This also controls the focus of your subject. I am sure most of you who got a DSLR want that out of focus look when you’re shooting a subject to totally separate the background from the subject. I know I got my DSLR for that! Well, it really depends on what you shoot. Another example is if you want to shoot landscape then you have to shoot at a smaller aperture to get everything in focus. Just play around with the settings and you’ll eventually get it and figure out what it’s used for.
Manual Mode – this is where the camera gives you total control. It is so easy to mess up in this mode but this mode will also give you shots you’re looking for. You control the Shutter, Aperture, Exposure, ISO and everything else! I only use manual when I have my camera on a tripod or I want a specific look. But let’s just be honest, we’re not gonna get the exact look we’re looking for with just the camera.
Photography is expensive and you always have that need to acquire new equipment that you think you might think you need! I have gone through several lenses before I stuck with my current ones. So before you go out and buy those things, ask yourself, what would Jesus do?lol. Actually, no, don’t ask that, just ask yourself, “what am I shooting and do I really need this?” This will save you money!
So with all the things I just said in mind, go out and shoot! Play around with the settings and you’ll find something that you really like. The beauty of it is that it’s digital, it doesn’t cost you much to take pics unlike film. Yeah your shutter count increases but the life of your shutter is probably at 150k+ clicks.
Have fun! Again, if you have any questions, feel free to just comment below or email me.
EDIT: I found a very useful video on camera basics. Understanding your camera.
Camera 101 – What Lens to Get?
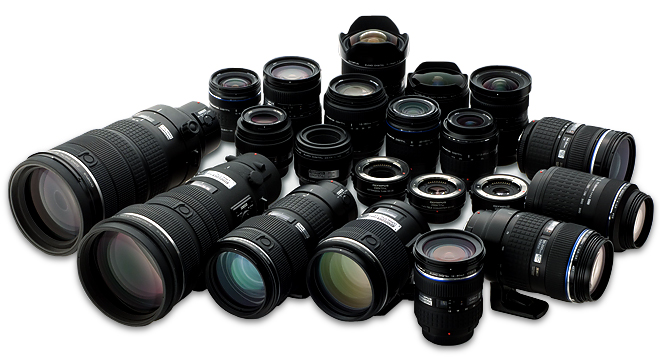
Image taken from: Teluglobe.com
If you thought choosing a camera was difficult, try lenses! Lenses are manufactured by the camera manufacturers or 3rd party manufacturers. When buying a lens, you always have to consider what it is that you are going to be shooting. Low light or plenty of light? Moving or still? What is the distance? Do you want to separate your subject from your background? These are just some of the questions that you need to ask yourself before buying your lens. Also, since you’re just getting started with DSLR photography, make sure that you stay away from using “Auto”. Use “P” mode instead, this is auto with smart features of your DSLR. I will talk about the modes on the next post.
What are you shooting?
People, Landscapes, Wildlife, Airplanes, flowers, etc. are just a few that I could think of, but there are plenty of other things to shoot. You might say “I want something that I can use for everything”. Okay, most likely, you purchased a camera with a lens kit and most kit comes with 18mm-55mm depending on which kit you bought. 18mm-55mm is a nice range when you’re starting and after shooting with that range for a while, you’ll start to want something and it is something that is missing from what you currently have. You might say “I like my shots, however they are not wide enough” or “I don’t have enough reach to get a close-up shot”.
Okay, if you’re looking for something wider, consider buying something lower than 18mm, the lower the number, the wider it gets.
If you want to get a closer/tighter shots, then consider buying a zoom lens that’s anything more than 55mm. Usually, it goes from 55mm-200mm or 70mm-300mm, depending on the manufacturer and the aperture (I will talk about this later).
These should get you started on what it is that you need.
Lighting Condition?
All of your shots depends on lighting. Avoid harsh shadows as much as possible such as direct sunlight or harsh lights produced by spot lights (unless you are going for that look). When shooting under direct sunlight, your images will have dark shadows. If you’re shooting a person, they will have “raccoon eyes” and the picture just won’t look good. There are ways to fill in those shadows and make your pictures look nicer if you really have to shoot under direct sunlight but I’ll talk about that some other time. I will focus on just the basics.
Plenty of light available
If you are shooting with plenty of available light, the type of lens you use doesn’t really matter (I know many of you will disagree with me but think like an amateur). With plenty of available light, your shots will most likely come out clear and crisp. However, low light condition is where the features of your camera will come into play. Your camera, your lens, your angles and everything else will come into play under this condition.
Low Light Condition
Under low light condition, your camera will try to adjust to get the best exposure and best shutter speed to get a clear and crisp shot. However, your camera is not perfect! You are still in control! There are a lot of things you can do to try to get your camera to take sharp pictures but that means that I have to get into technical terms. I want to answer your questions as simple as possible. So let’s try this, here are a few scenarios and what you can do to improve your shots.
You’re shooting in “P” mode and your picture is nicely exposed but it’s blurry (Let’s say you’re taking a picture of a person). What do you do?
– First, look at your screen and preview the picture that you just took, then click on the info button. This will provide you the aperture, ISO, Shutter speed, Exposure,etc.Look at ISO, aperture, and shutter speed. Make a note of those and switch your mode from “P” to “M”. Some cameras automatically adjust the ISO but it needs to be enabled. Let’s say your camera doesn’t automatically adjust. What you need to do is increase your ISO and shutter speed and also adjust your aperture.
ISO – controls the camera’s sensitivity to light
Shutter speed – Freezes or blurs the picture
Aperture – Controls the amount of light
Now that you have some idea on what each feature does, let’s try to tackle the problem. Let’s say you looked at your image and the settings are: ISO: 200, Shutter Speed: 1/30s, Aperture: f/5.6. What this means is that you took the image at 200 ISO using 1/30 of a second and at aperture f/5.6 (f/5.6 on a kit lens usually means that you shot your pic at 55mm). Let’s do this step by step, but let’s start with the shutter speed:
– The rule of thumb is your shutter speed should be greater than or equal to your focal length. For example, if you’re shooting at 55mm, your shutter speed should be at least 1/55th of a second or higher to get a clear shot. So switch to manual mode and adjust your shutter speed to 1/50th and take another picture. Is the picture now sharper but it also became darker? The reason for that is because your camera didn’t allow enough time for the light to properly expose the picture. So let’s try another fix.
Let’s do this by now adjusting your aperture. Since you are using a variable aperture (meaning, your aperture changes every time you change the zoom length), try using the lowest/largest aperture your lens allow. In this case, your lens probably only allows as low as f/3.5, so you have to change your focal length to 18mm. So now you’re shooting at 18mm at f/3.5
Take another picture, your picture should now be a lot clearer and a little brighter but still not as bright as how you would want it to be. Try changing that shutter speed, you can go as low as 1/20th without being blurry. If that’s still dark, try increasing your ISO. If your camera allows you to increase your ISO by 50, try ISO 250, 300, 400, etc. Then keep increasing it until you get your picture to come out the way you want it. Please note that the higher the ISO, the more noise it introduces (your shots will be grainy)
That’s it for now and I hope you learned something new. I will have a dedicated Camera 101 page will links to different sites that talks about everything that I just mentioned.
Click on the links below to view 5 episodes about lenses on D-Town TV by Kelby Media Group:
Camera 101 – Which Camera to get?
![]()
![]()
![]()
![]()
Which camera to get? This is the most questions that get asked all the time! Canon, Nikon, Pentax and Olympus are just a few of the major consumer camera manufacturers out there. Leica? I’m not even going to talk about that! People who get that either has a lot of love for photography and has been into photography for a while or someone who has a lot of money and just wants to buy a very expensive camera. Since I can’t afford it, I wont talk about it. If you want to find out why, just google Leica Rangefinder and you’ll see why.
What Brand?
Now, which camera to get? I say get the camera that your friends own! So you can ask your friend on which lens, accessories to buy specific to your camera or even buy their used equipment. Most likely, your friend will upgrade his/her equipment and eventually sell it. Now that you’ve narrowed down the brand of the camera, another question is which one?
What Kind?
The question to ask really is “what is your budget”? You always have a number in your head that you are willing to spend on a camera. You might say, I’m just an amateur and I just want to take nice pictures. You can take nice pictures without spending a lot of money! Point and shoot camera will give you nice pictures, you just have to have an eye for it. If you don’t, spending on a more expensive camera will not give you a better picture, maybe a better quality but not a nice picture so save your money. Now, if you still insist on upgrading to a DSLR, then you need to find out how serious you are going to be in photography. Any entry level camera will do, it’s the lenses that you have to worry about. I’ll talk about lenses on my next update so this time, let’s just stick to cameras.
Pros and Cons of Entry Level Cameras: Pros: Cheaper Cons: It will not have the advanced features that most pro cameras have, but you’re just learning so it’s okay.
I use a Nikon and most entry level Nikon cameras do not have an Internal Focusing Motor(IMR). Having an IMR will allow you to autofocus on older lenses. Without IMR, you are going to have to manually focus to take shots. It’s really not that bad once you get used to it, but a lot of your shots will be blurry for the first…. let’s say, a thousand pictures! LOL.
So what kind of camera really depends on your budget. I say, spend less on camera and more on lenses and you’ll find out why once I start talking about lenses.
If you’re still undecided on what to do, watch the youtube videos below: “Pro Camera and Cheap Lens” Vs. “Cheap Camera and Pro Lens” & “Guide to DSLR”
Here is a Guide to Entry Level DSLR
Now What?
Now that you’ve decided which brand and what kind and your budget, you are now ready to start comparing the cameras that you’ve chosen. Luckily, I found a nice site that allows you to compare cameras side by side: http://snapsort.com/compare
If you have any questions, feel free to comment below and I will try to answer your questions.
Watch out for my next post as I will talk about the lenses and camera features that you need to consider when buying a camera and lenses.
Recent Comments